How to Create Braille Business Cards Using a Template file in DuxburyX
Note: This specific template was designed for cut-sheet business card media compatible with letter size Avery labels. To use other cards or braille label layouts or formats, some adjustments may be needed to the file. Please use the same instructions and make changes as needed to the settings of the file.
- To make your business cards, first use your ink or laser printer to produce any print you would like on the cards, both front and back. This step is necessary now because once the cards have been embossed, they can no longer be put through a printer. If you’ve used an ink printer, make sure to leave adequate time for the ink to dry before embossing your cards.
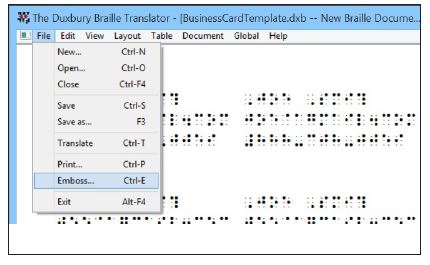
- Using Duxbury 11.1 SR 4 or higher, open the Duxbury Business Cards template.
Please follow these steps:
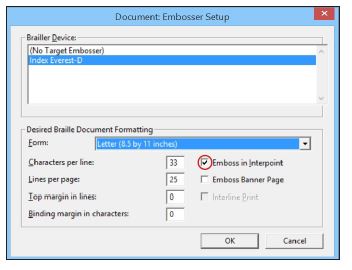
- Choose Embosser Setup from the Document menu in DBT. Make sure that your Index V4 or V5 embosser model is selected.

- Ensure that the form selected is "Letter (8.5x11 inches)" or "Narrow width, 11 inch long, braille paper," depending on your version of DBT. The characters per line should already be set to 33 and the lines per page to 25. Margins should already be set at 0. [The correct positioning of the label text is already defined with in the template file.] Select OK to save any changes and then ctrl+S to save the document with your document settings.
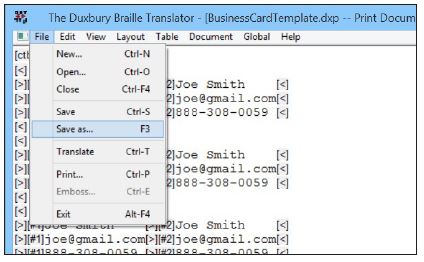
- Now enter your content. Replace the default content for each line with the content you want translated to braille. [Max 14 characters on each line] It is important that the front page content in the Column 1 cards match up with the back page content in Column 2; this is particularily important if you have different text on the front and back side of the page.
- Once you have entered your individual content select Save As from the File menu in DBT. Save the file using your own new unique name. This is important in case the original template file is needed for referencing later.
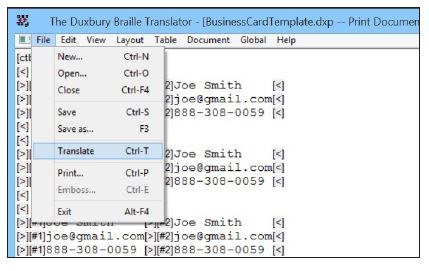
- Now select Translate (Ctrl+T) from the File menu. In the braille document, verify that your card content for the individual lines did not wrap down, and that the content from the first column does not interfere with text in the next column. If adjustments are necessary, return to the text document and make the needed changes; then translate the document again.
- Once satisfied with your braille label document, verify that your embosser is on and online. If you have pre-printed your business cards, be sure to load them into the embosser with the top edge down and the front of the cards facing you. Once the cards are loaded into the embosser in the correct orientation, press Ctrl+E in DBT and follow the prompted wizard to emboss the file.