Replace main board Everest-D V4-X
Remove the back plate
- Remove the four screws holding the back plate
- Lift up the back plate by placing a Phillips screw driver between the lower center of the back plate and the aluminum profile where the back plate is positioned in.
- Lift up the back plate carefully
Remove the faulty main board V4
- Release the main board from the 4 upper click connectors
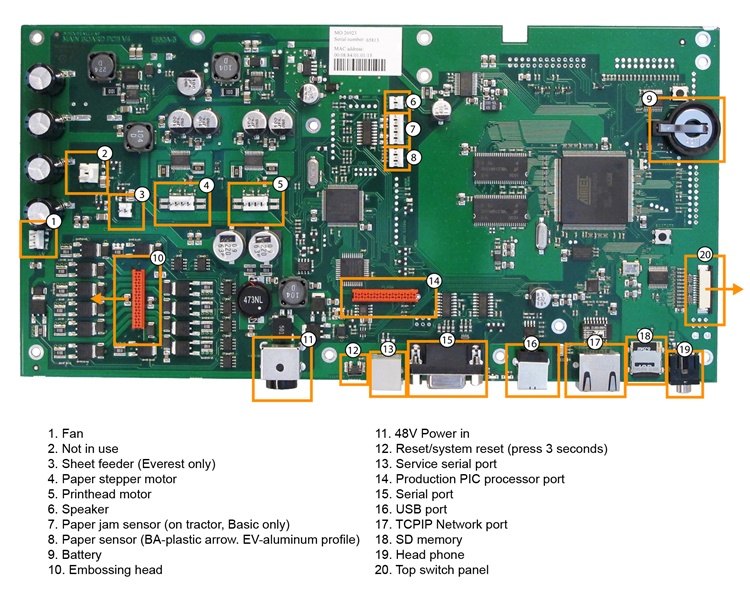
- Tilt the main board 45 degrees and remove all cords/cables connected to the main board: Embossing head cable, Embossing head motor cable, Paper feed motor cable, Paper sensor cable, Sheet feeder cable, speaker cable, fan and front panel cable (see image below for further reference of cable locations on the main board)
- Remove by lifting in a 45 degree angle
Insert the new main board V4
- Insert the new main board at a 45 degree angle and connect the cords back to their proper placement on the main board. See below image as a reference. Note: It is exceptionally important that all cables are placed back in their correct position, if not the embosser may not function properly.
- Press onto the four metallic clips
Mount the back plate
- Mount the back plate in position and tighten the 4 screws
Link to Replace main board video
Understanding the functions of the main board and cable connections (see image below):