Replace SD-card on Everest-D V4
How to:
Ensure that the unit is completely powered off.
1. Remove the back plate by removing the four (4) screws on the lower edge of the back plate. Remove the back plate by lifting upward. TIP: to lift the back plate of the Everest-D it may help by placing a flat screwdriver in the cut out in the lower center of the back plate relieving the back plate from its position.
2. Open the main boards Printed Circuit Board (PCB).
Release the PCB from the standoffs by pulling the PCB outward and flipping the PCB.
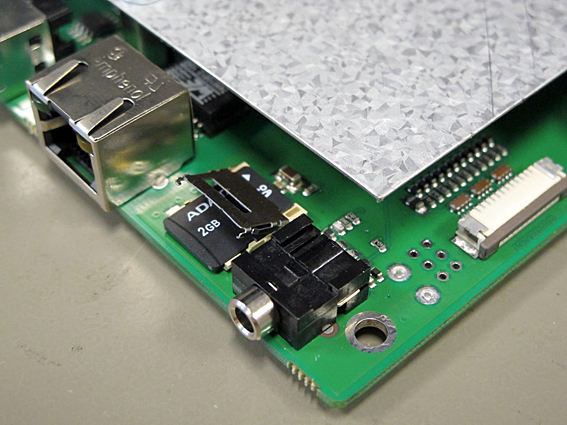
3. Remove the SD-Card. It is located on the main board between the Internet connector and the headphone connector. Press the SD-card holder in giving slight pressure to the center of the PCB main board, automatically releasing the SD card holder and making the SD-card easily removable.
4. Insert the new SD-Card in position and close the card holder. The connectors should be facing downward and against the center of the main board. Note: It is important that the SD card is not loose, ensure that the new SD card is securely fastened with in the holder properly.
5. Power on, the echo Everest-D V4 confirms correct installed SD-card and starting up sequence.
6. Place the back plate in position and insert the four screws.